MoRE-Getting-Started
Introduction for IBM Modernized Runtime Extension for Java
Introduction
IBM Modernized Runtime Extension for Java (MoRE) is an extension of WebSphere® Application Server Network Deployment (ND) 9.0.5 that enables you to run and manage Liberty servers from the traditional WebSphere environment. With MoRE, Liberty servers can be configured, clustered, and administered using familiar tools like the administrative console and wsadmin scripting.
About this lab
In this interactive, hands-on lab, you’ll explore the cutting-edge capabilities of WebSphere Application Server and MoRE, which are designed to supercharge your modernization journey.
Through guided modules, you’ll deploy modern Jakarta EE and Spring Framework applications to a Liberty server or cluster, using the WebSphere Administrative Console and/or automation with wsadmin scripts. Whether you’re modernizing legacy systems or building cloud-native apps, this lab is your launchpad into the next generation of enterprise application management.
Getting started
This section guides you through the initial setup of the lab environment. Perform all tasks from the student virtual machine.
Lab environment overview
The lab environment is preinstalled with the following packages:
-
WebSphere Application Server Network Deployment (ND), version 9.0.5.24+, running on Java SE 8
- Modernized Runtime Extension for Java (MoRE), version 1.0.0.1+
-
WebSphere Liberty, version 24.0.0.6+, running on Java SE 17+
In addition, the environment is preconfigured with the following profiles and server instances:
- A Deployment Manager (
dmgr), which serves as the central controller for the WebSphere cell.Create a Managed Liberty Server
After the instllation, follow this steps to create a Managed Liberty Server
demo.- Launch the WAS Admin Console by selecting it from your browser bookmarks or navigating to the https://localhost:9043/ibm/console URL.
- Go to Servers → Server Types → WebSphere Application Servers →New….
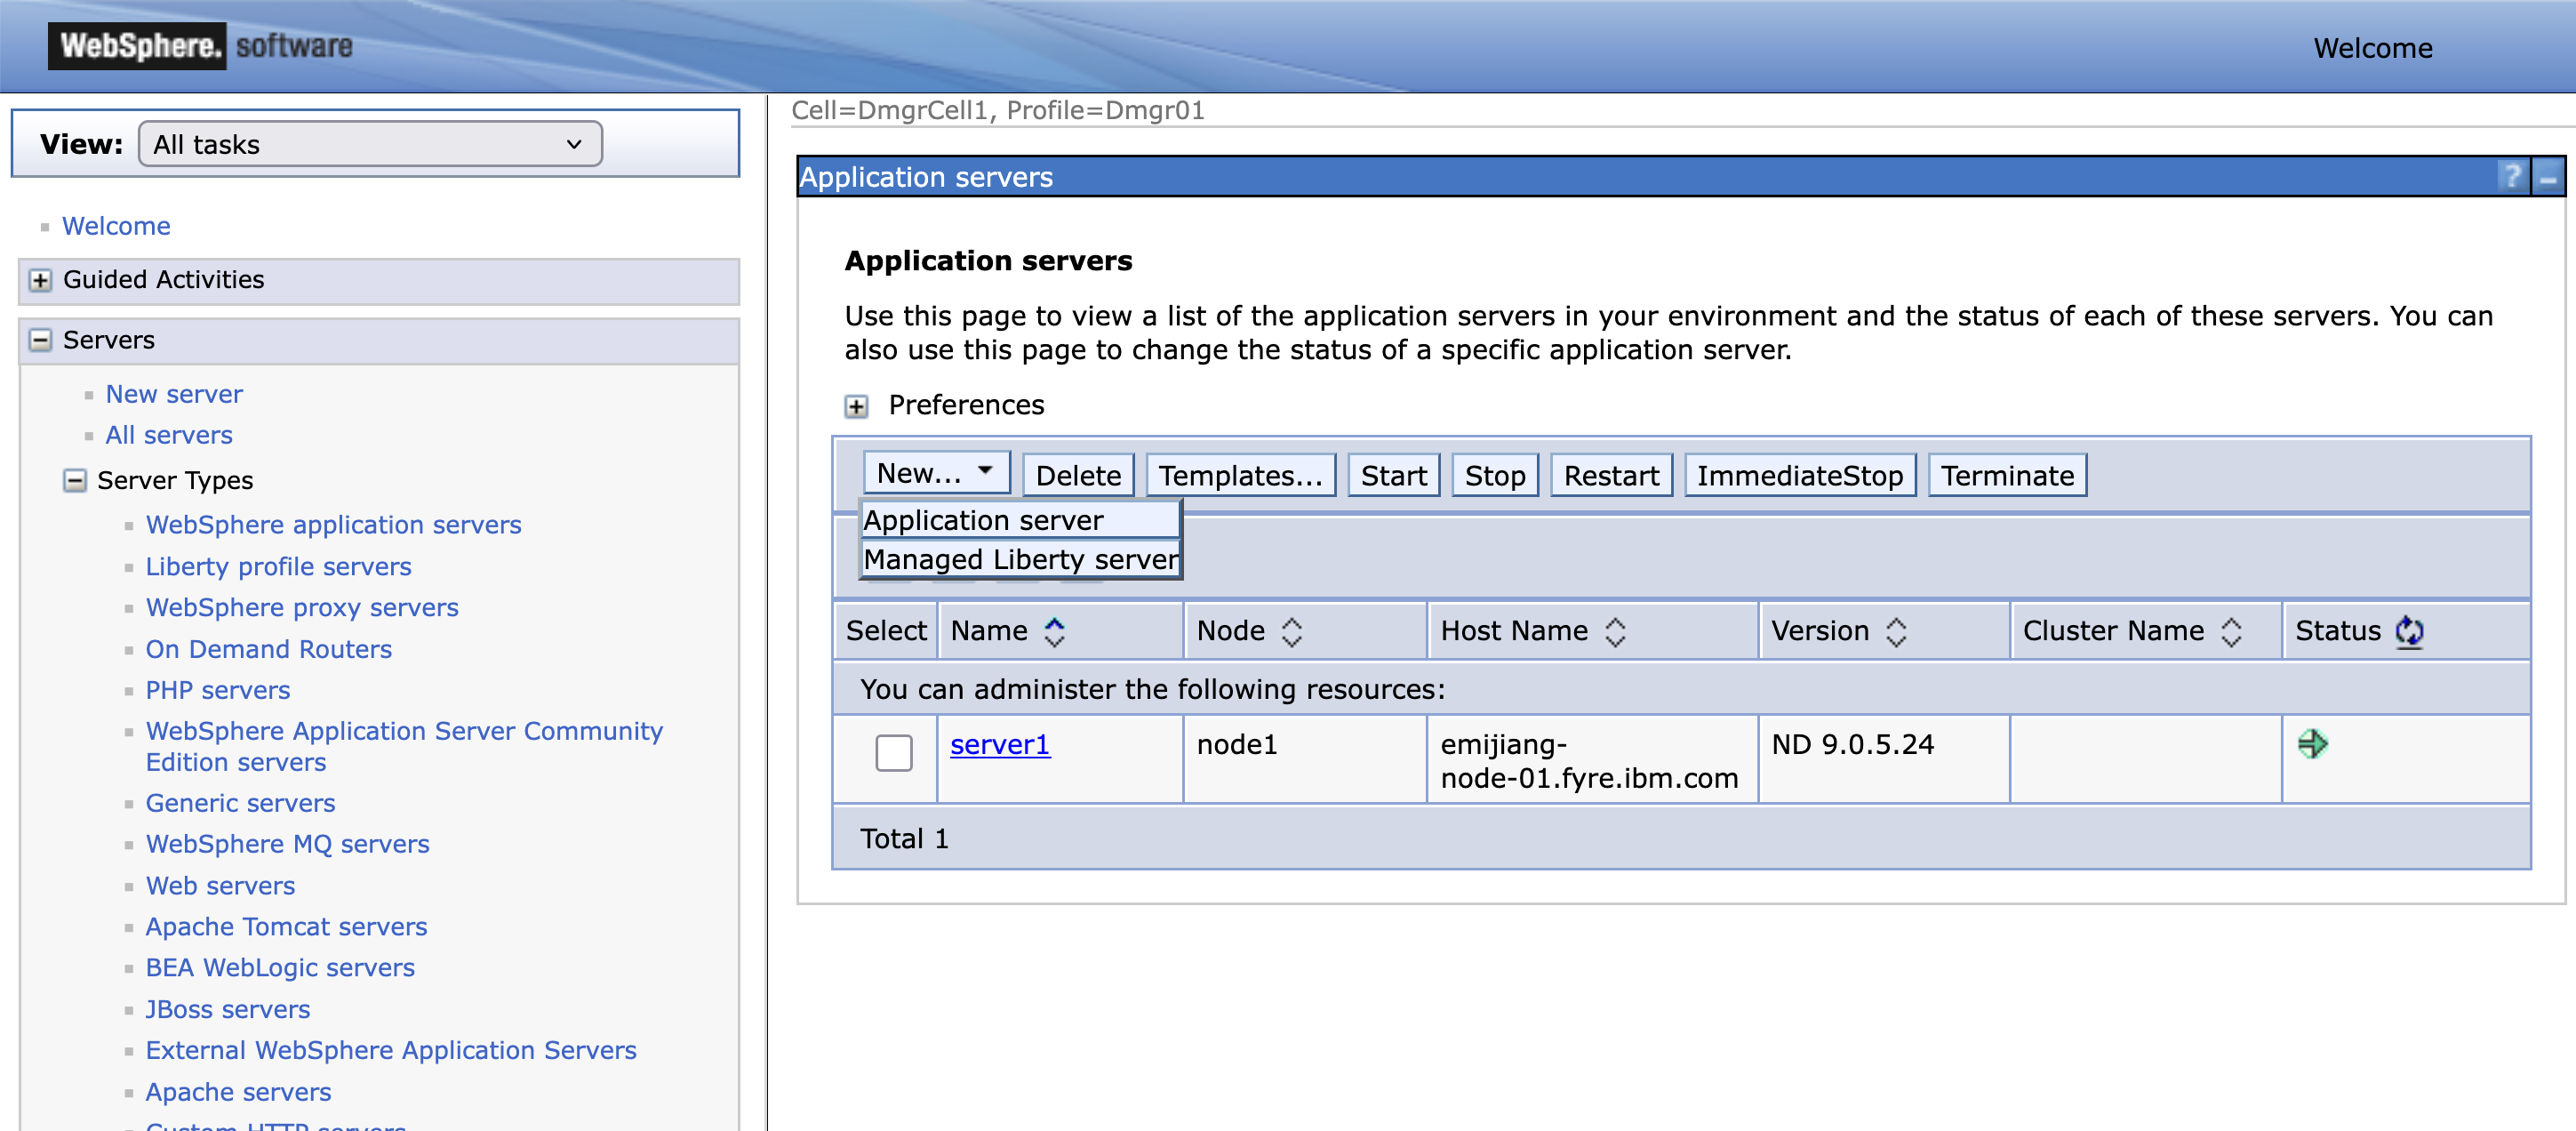
- In the
Application serverspanel,
- Under New…, select Managed Liberty server and type
demounder theServer nametextbox.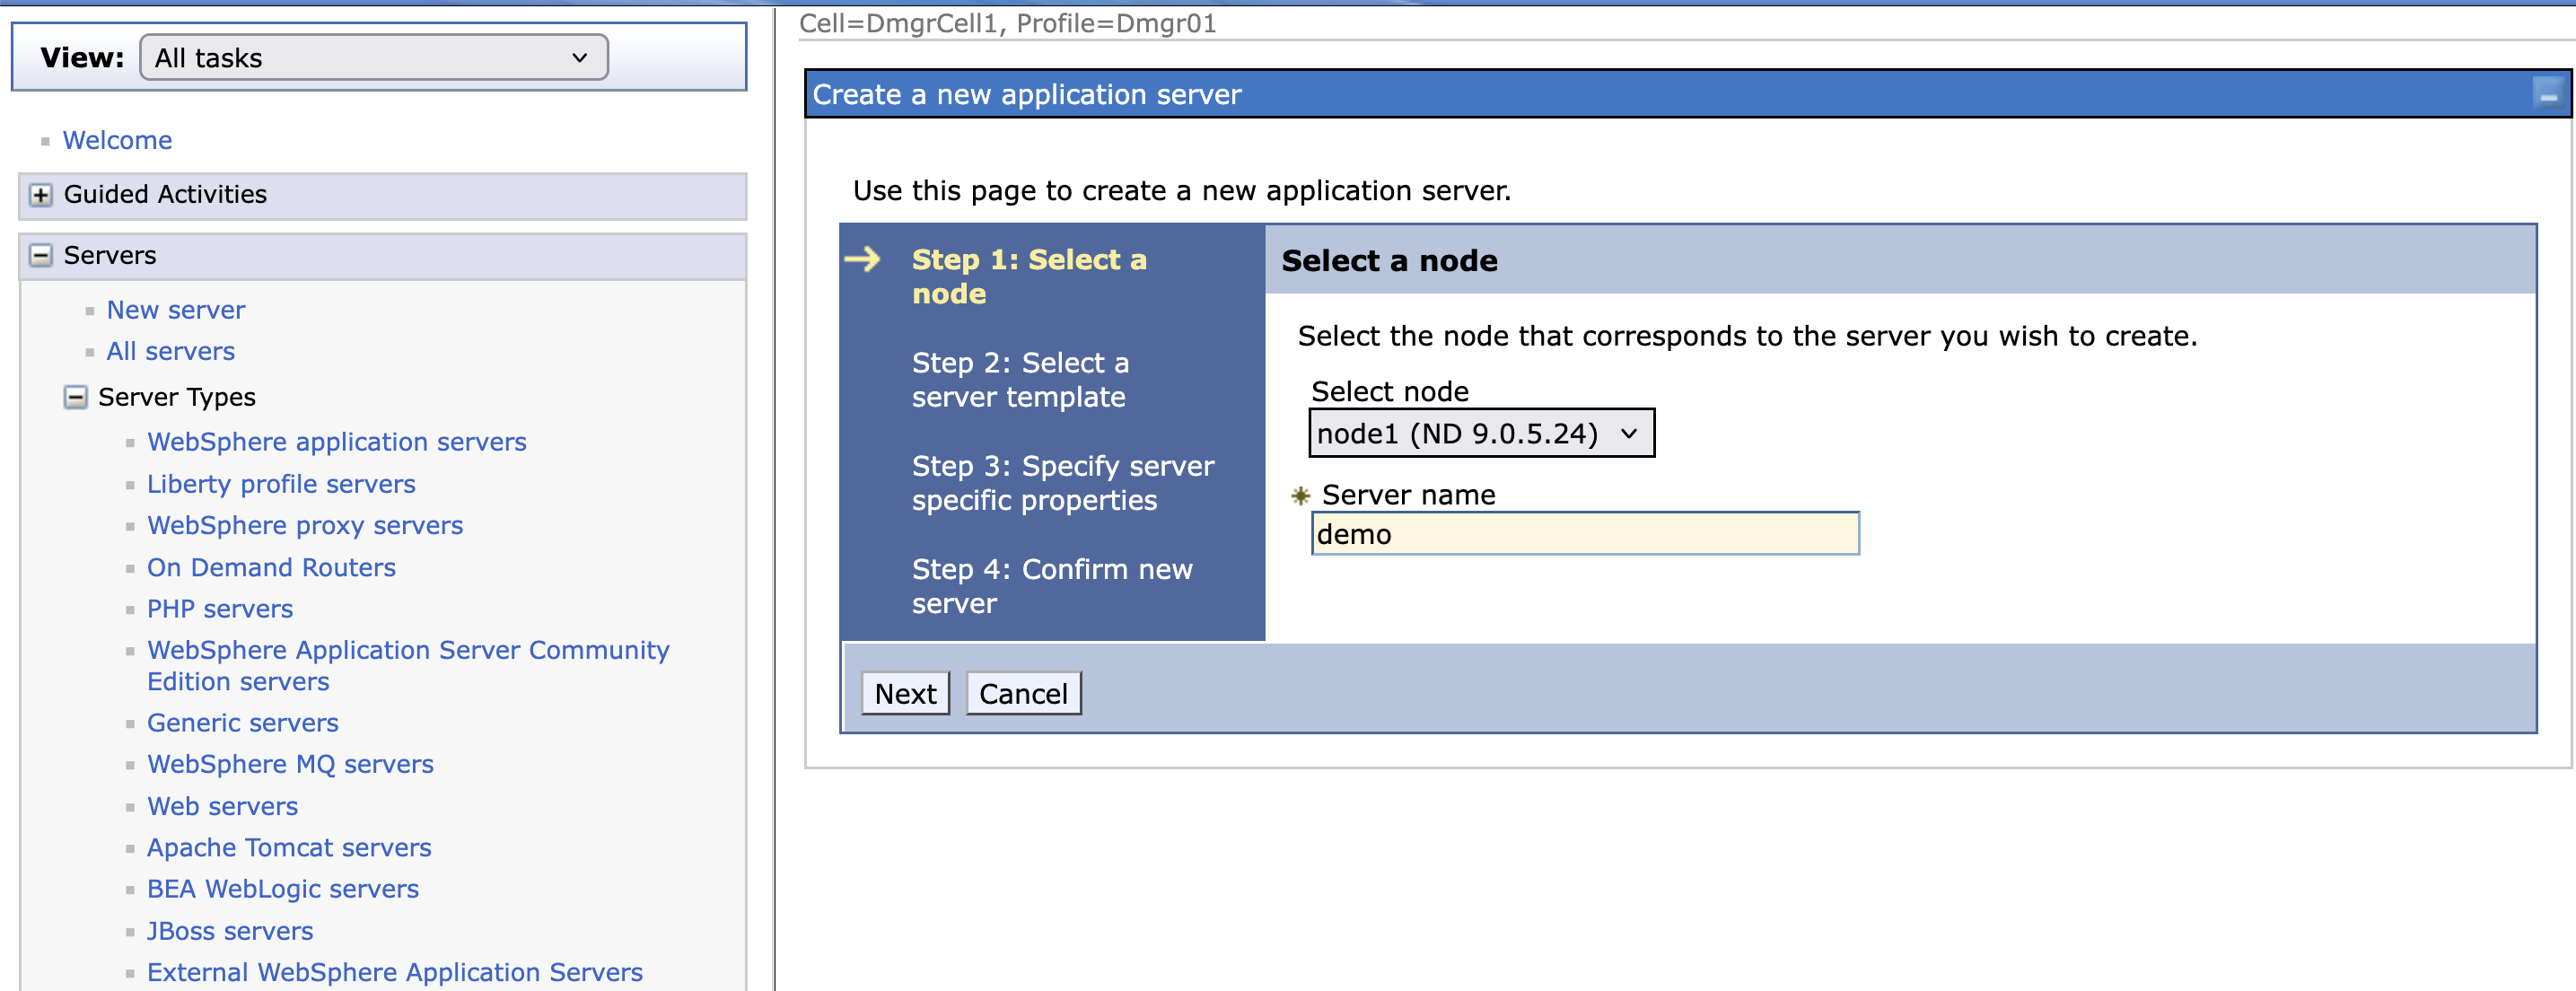
- Click Next on Step 2 and 3.
- Click Finish on Step 4.
- Click Save on the displayed message.
 The next step is to deploy applications to the created Managed Liberty server.
Deploy apps to a Managed Liberty Server
After you have completed the installation, it is time to deploy Jakarta EE 10 or Spring Framework 6.x apps to your Managed Liberty Servers. This downloads contains a couple of apps to help you get started.
A Jakarta EE 10 application
The app modResort utilises Jakarta EE 10 technologies. Clicking the above link to the app to download this war to your local system. The source code can be found here.
Installing the application WAR file
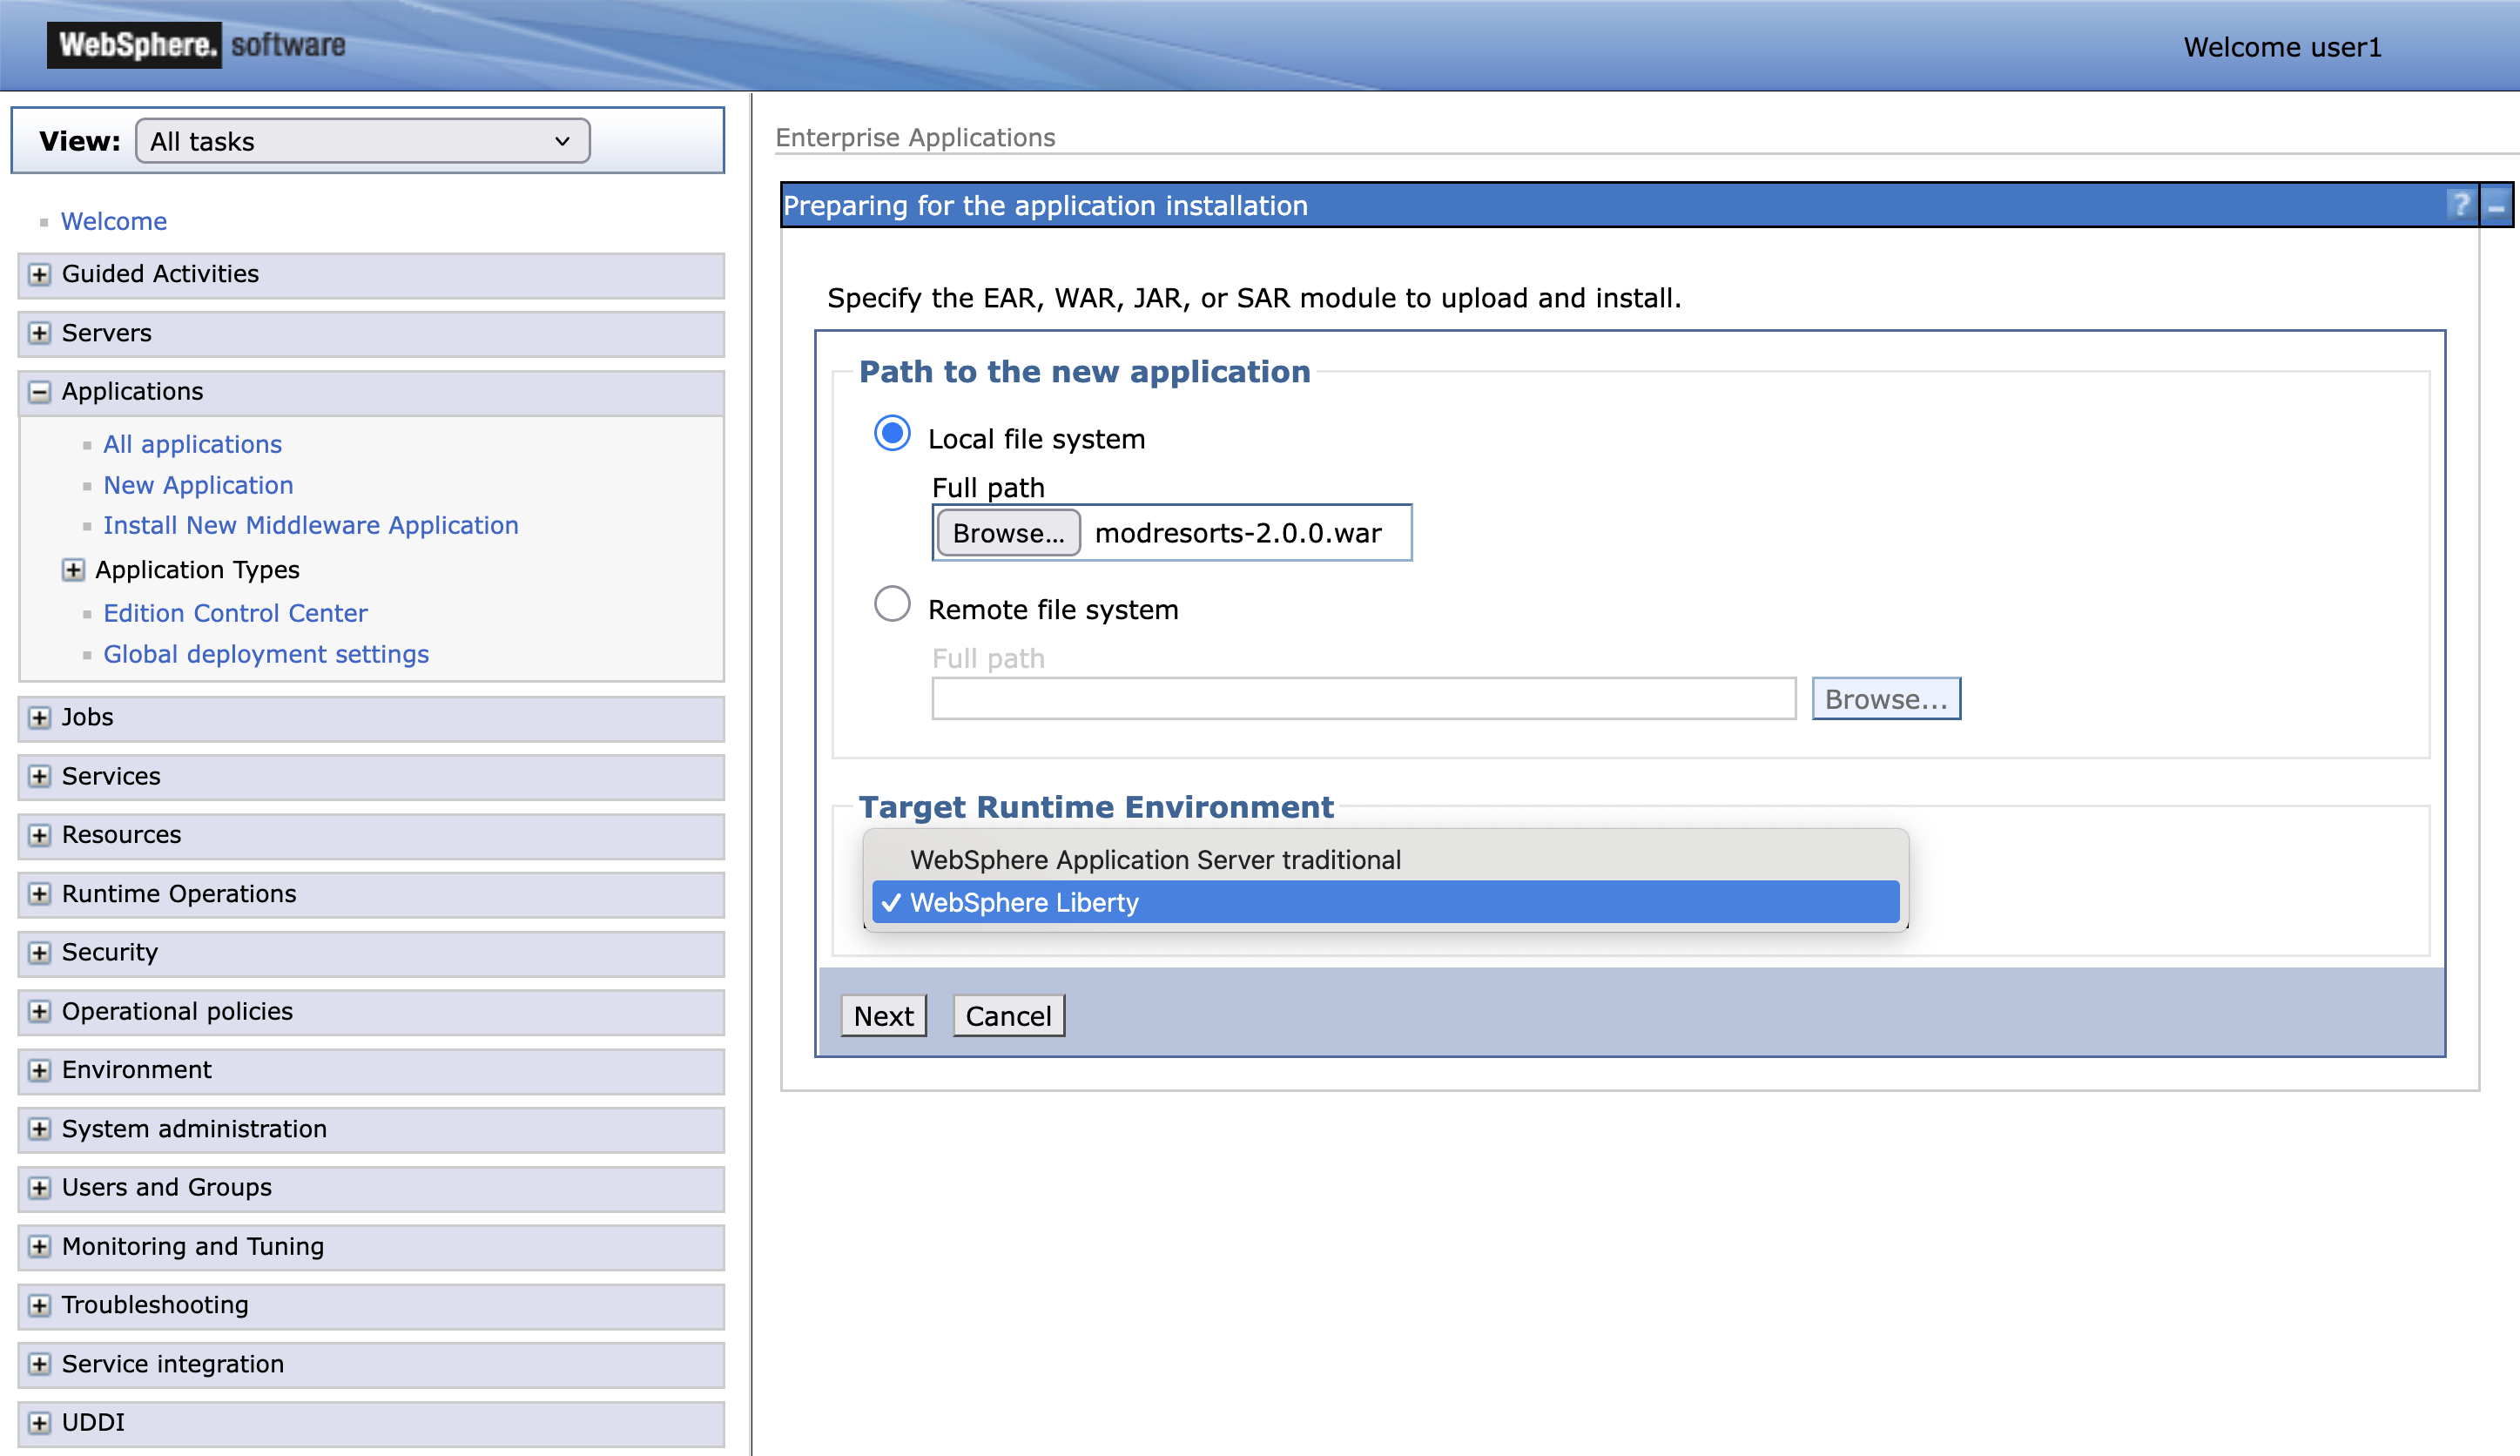
-
Launch the WAS Admin Console by selecting it from your browser bookmarks or navigating to the https://localhost:9043/ibm/console URL.
-
Go to Applications → New Application → New Enterprise Application.
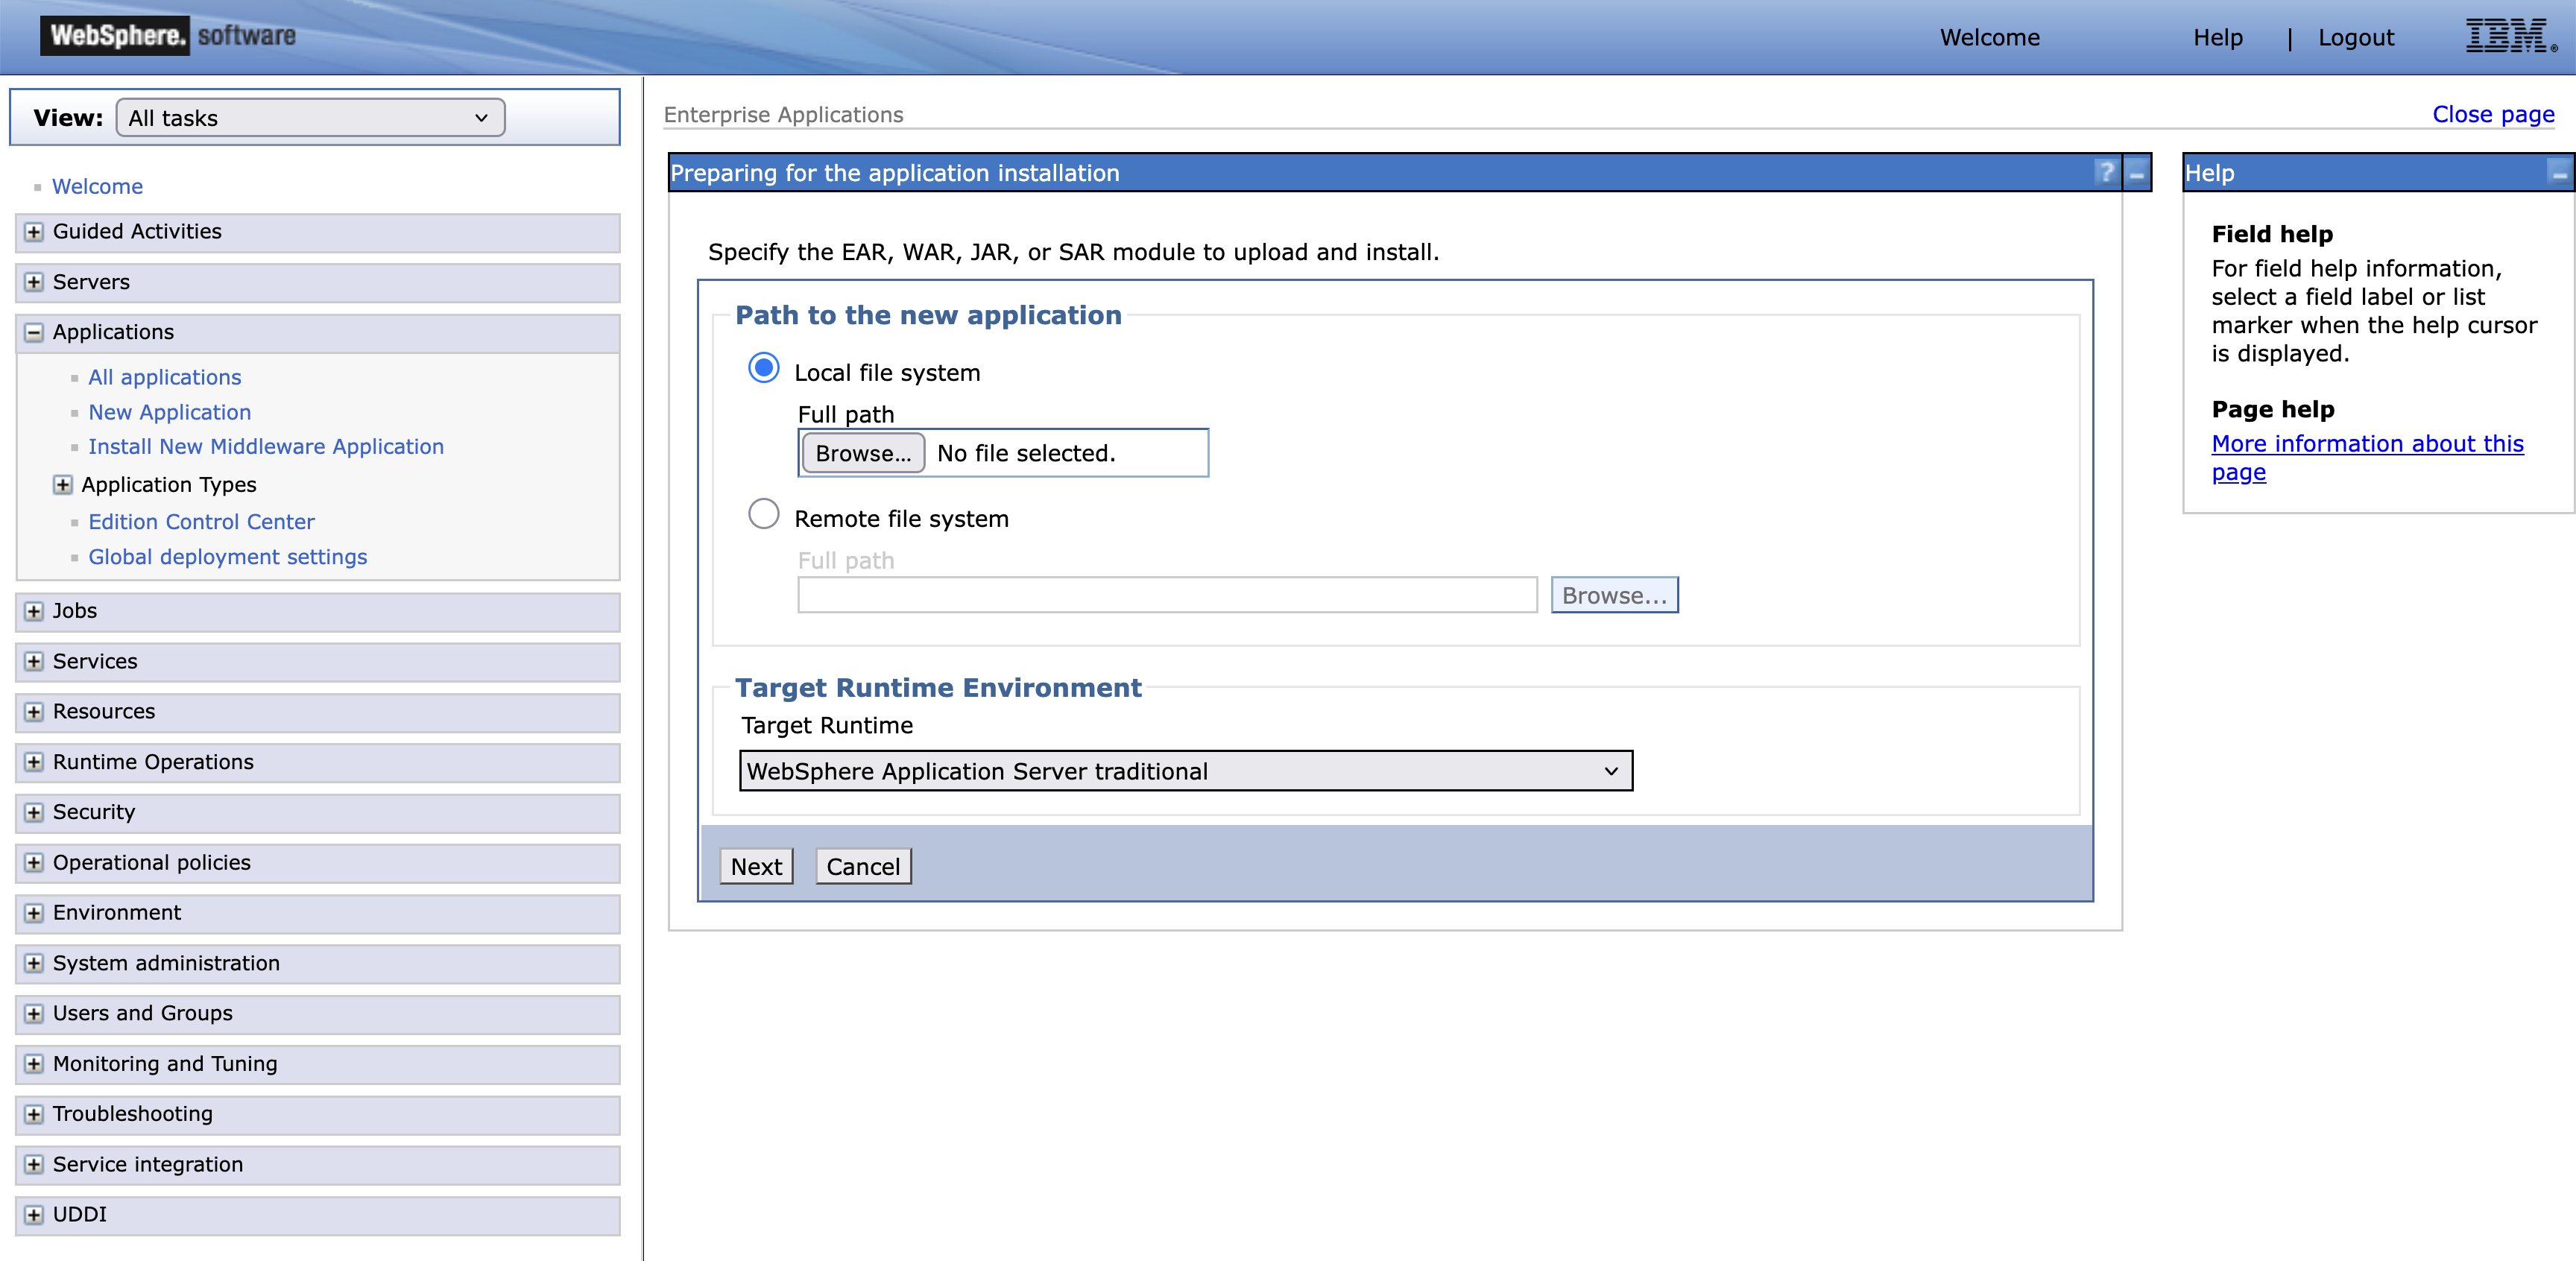
-
In the installation panel:
- Under Path to new application, select Local file system and choose the WAR file
modresorts-2.0.0.wardownloaded earlier. - Set Target Runtime Environment to
WebSphere Liberty
Click Next and wait for the application to upload.
- Under Path to new application, select Local file system and choose the WAR file
-
Choose Fast Path and click Next.
-
Leave Step 1 unchanged and click Next.
-
On Step 2, map the application module:
-
Under Cluster and servers, select the server
demo. -
Check the box next to
modresorts-2.0.0.warand click Apply. -
Confirm that the server
demois listed under the Server column for themodresorts-2.0.0.warmodule.
Click Next.
-
-
On Step 3, confirm that the Context Root is set to
/resortsand click Next. -
On Step 4, review the installation summary and click Finish.
-
After the installation completes, click Review.
Select Synchronize changes with Nodes, and click Save. Click OK when synchronization is complete.
- Start the Managed Liberty server
demo, by following the following instructions.- Go to Servers → Server Types → WebSphere Application Servers →
- Click on the checkbox next to
demoand click onStartbutton.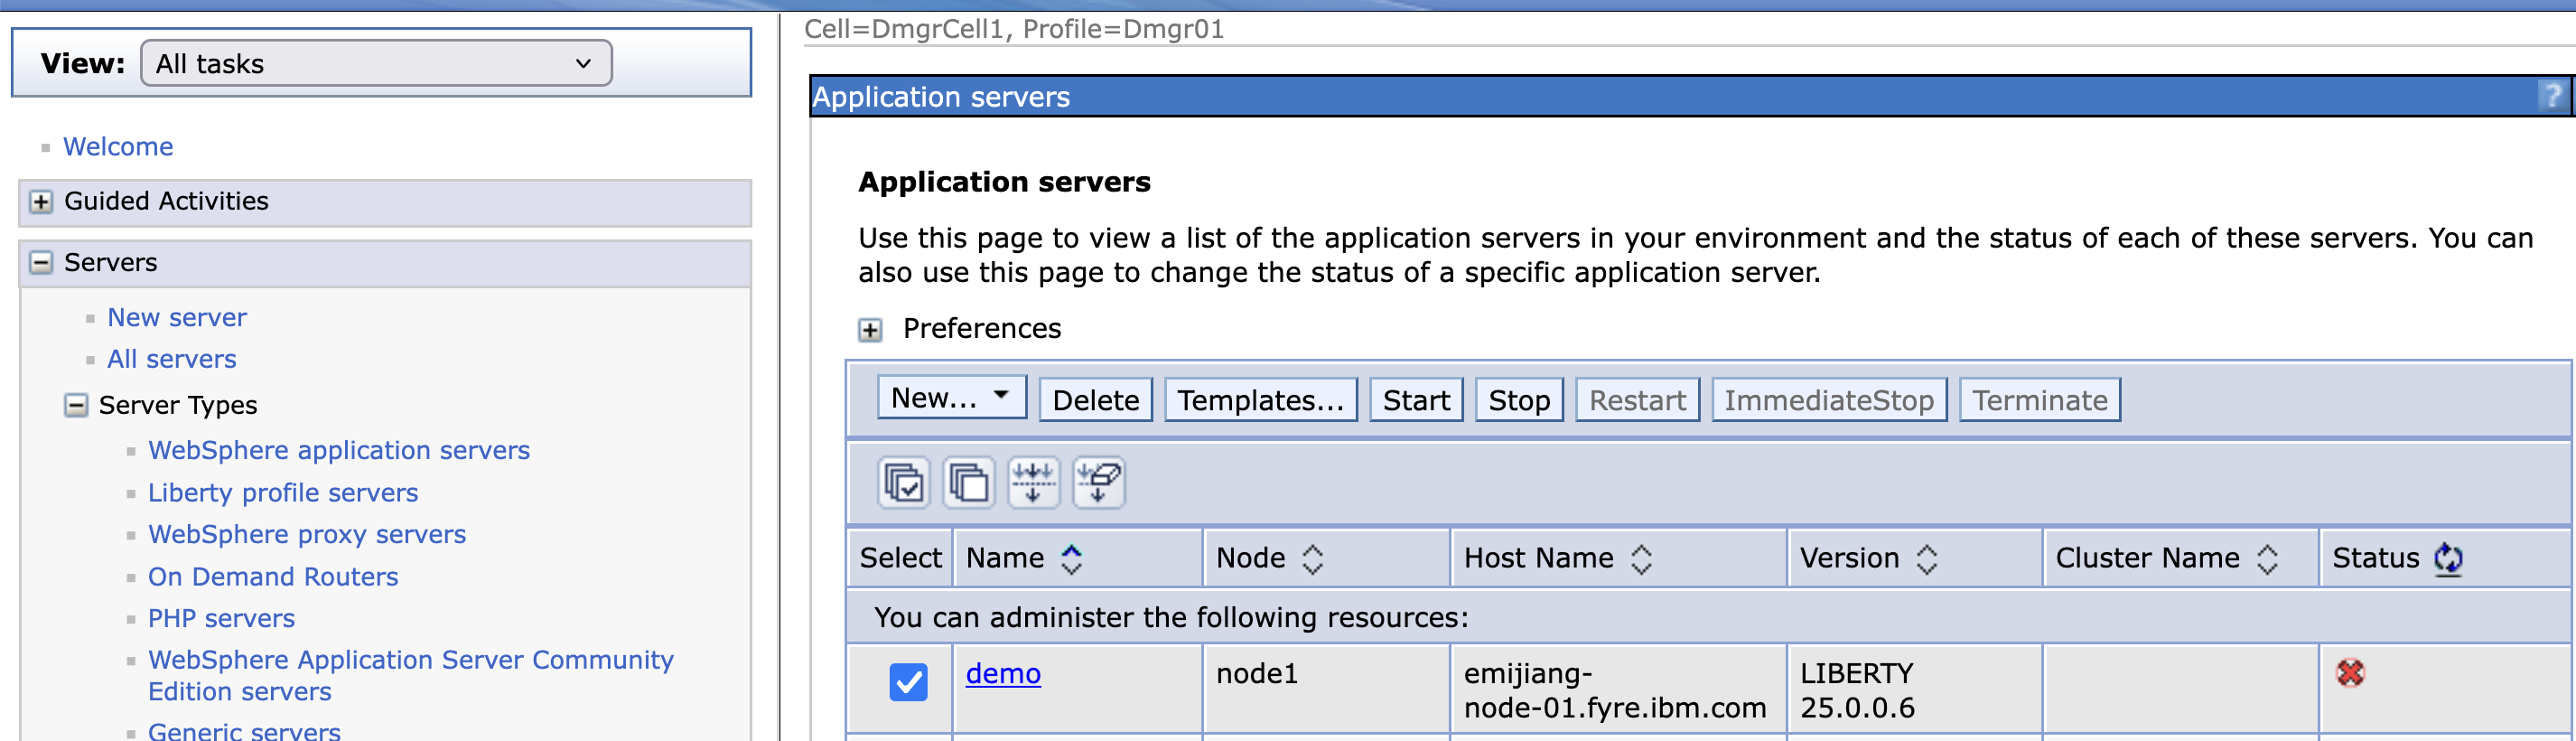 Both the server and the app should be started.
- Try out the application
- On a terminal window, go the
demoMLS and then displayconsole.loge.g. (cat /opt/IBM/WASND/profiles/AppSrv01/managedLiberty/usr/servers/demo/logs/console.log). - Find the endpoint for the
ModResorte.g.http://9.46.96.145:9081/resorts/. The following should be displayed.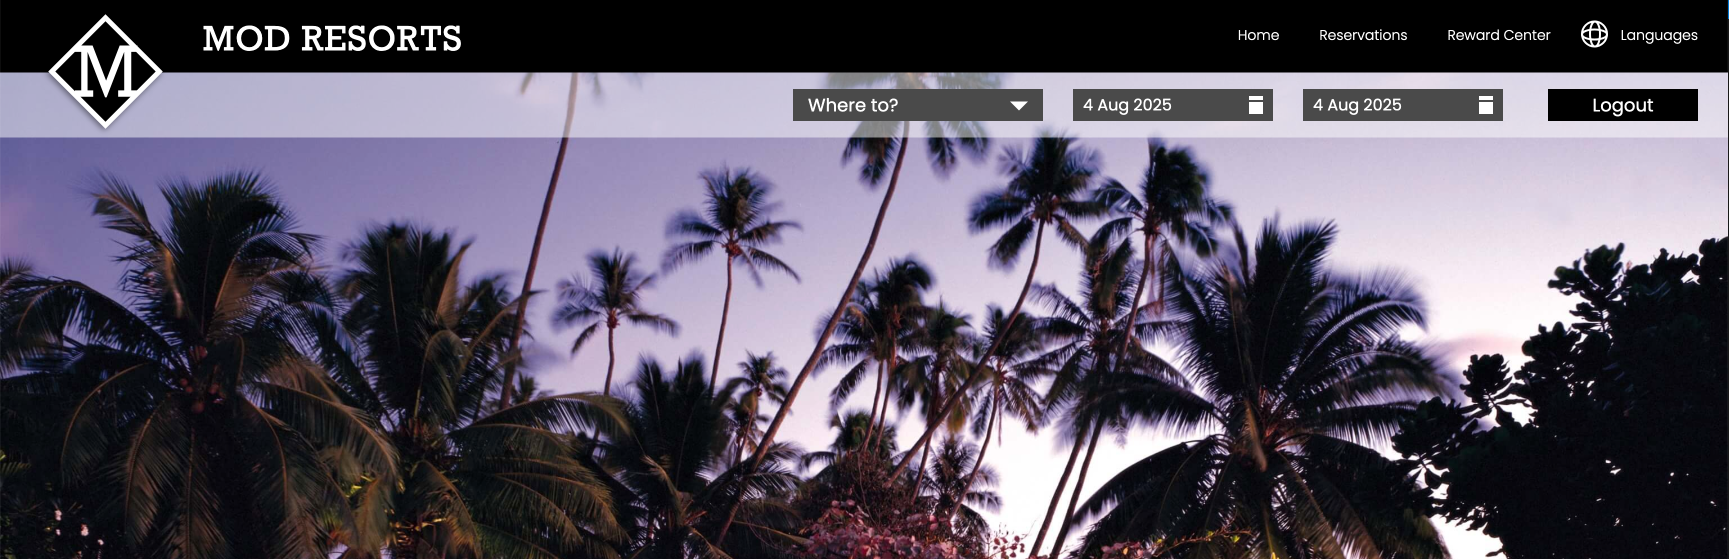
- On a terminal window, go the
A Spring Framework 6.x or Spring Boot 3.x application
The app Spring Petclinic utilises Spring Framework 6.x and Jakarta EE 10 technologies. Refere to this instruction for accessing the source code. For deploying an application using Spring Framework or Spring Boot technologies, the compatible versions for Spring Framework are 6.x while Spring Boot versions are 3.x. Any earlier versions are not compatible with Jakarta EE 10, so the applications might not work.
You can use the same steps as documented above to install this application.
Deploy apps to a Managed Liberty Server cluster
Follow this instruction to deploy applications to a Managed Liberty Server cluster.